Hierarchy Panel
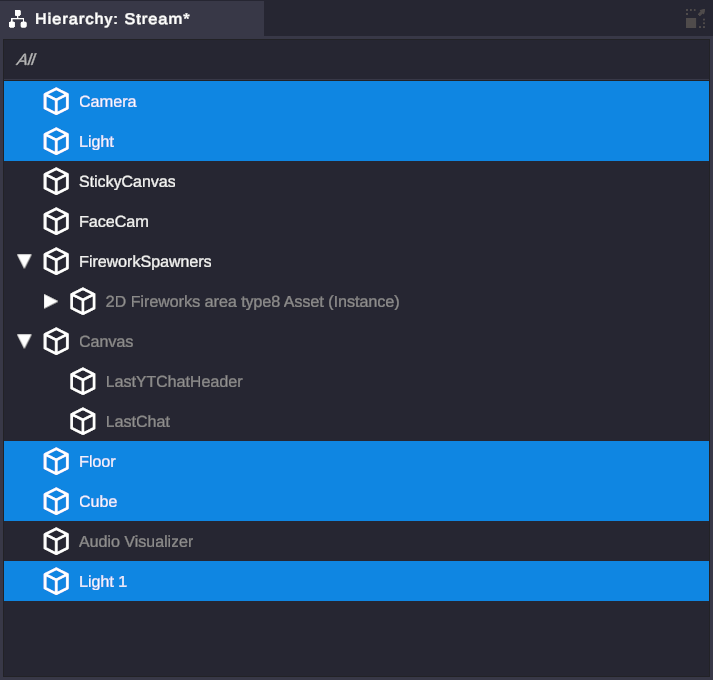
The Hierarchy panel shows all scene objects in your current scene as a tree structure. Use it to select objects, organize them into parent-child relationships, and manage visibility.
Understanding the Hierarchy
Section titled “Understanding the Hierarchy”Tree Structure
Section titled “Tree Structure”Scene objects are displayed in a hierarchical tree. Child objects are indented under their parents. When you move, rotate, or scale a parent, all children move with it.
📁 My Scene├── 🎥 Main Camera├── 💡 Key Light├── 📦 Background Group│ ├── 🖼️ Background Image│ └── ✨ Particles└── 👤 Streamer ├── 🎭 Avatar Model └── 💬 Name TagVisual Indicators
Section titled “Visual Indicators”| Indicator | Meaning |
|---|---|
| White text | Object is enabled |
| Grey text | Object is disabled |
| Cube icon | Scene object |
| Indentation | Shows parent-child relationship |
| ▼ / ▶ Triangle | Expand/collapse children (click to toggle) |
| Blue highlight | Currently selected object |
Working with Objects
Section titled “Working with Objects”Selecting Objects
Section titled “Selecting Objects”| Action | How |
|---|---|
| Select single object | Click on it |
| Add to selection | Ctrl + Click |
| Select range | Shift + Click |
| Select all | Ctrl + A |
Selected objects are highlighted and shown in the Inspector panel.
Renaming Objects
Section titled “Renaming Objects”Double-click an object’s name to edit it. Press Enter to confirm or Escape to cancel.
Good naming helps you find objects later, especially when referencing them in node graphs.
Enabling and Disabling
Section titled “Enabling and Disabling”Disabled objects are hidden in the scene and don’t run their behaviors. Toggle an object’s enabled state:
- Right-click → Enable/Disable
- Use the checkbox (if visible)
- Use node graphs to control at runtime
When you disable a parent, all children are also hidden (but their individual enabled state is preserved).
Organizing Objects
Section titled “Organizing Objects”Reparenting
Section titled “Reparenting”Drag an object onto another to make it a child:
- Click and hold the object you want to move
- Drag it onto the target parent
- Release to drop
The object’s transform becomes relative to its new parent.
Reordering
Section titled “Reordering”Drag objects between siblings to change their order within a parent. Order can affect rendering (objects lower in the list render on top for 2D elements).
Grouping
Section titled “Grouping”Create organizational groups to keep related objects together:
- Select one or more objects
- Right-click → Group
- A new empty parent is created containing your selection
To ungroup, right-click the group → Ungroup. Children are moved to the group’s parent level.
Common Operations
Section titled “Common Operations”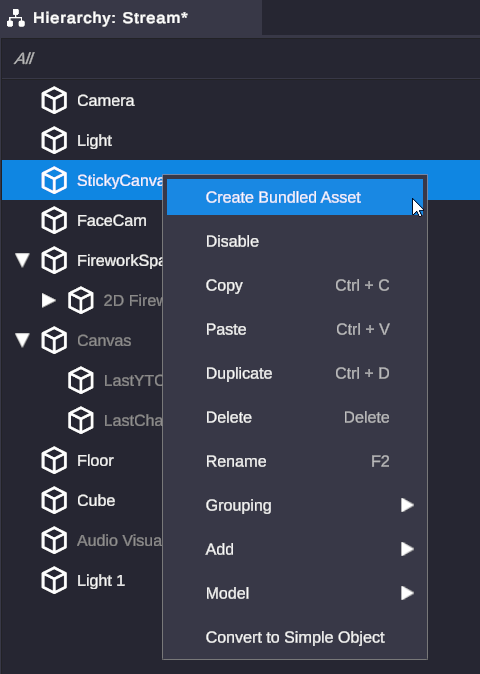
| Operation | Method | Shortcut |
|---|---|---|
| Delete | Right-click → Delete | Delete key |
| Duplicate | Right-click → Duplicate | Ctrl + D |
| Group | Right-click → Group | - |
| Ungroup | Right-click → Ungroup | - |
| Rename | Double-click name | F2 |
| Enable/Disable | Right-click → Enable/Disable | - |
| Add Mesh Effect | Right-click → Add → Mesh Effect | - |
Deleting Objects
Section titled “Deleting Objects”Deleted objects are removed from the scene. This action can be undone with Ctrl + Z.
⚠️ Warning: Deleting a parent also deletes all children.
Duplicating Objects
Section titled “Duplicating Objects”Creates a copy of the selected object(s) with a unique name. Duplicated objects are placed at the same level as the original.
Adding a Mesh Effect
Section titled “Adding a Mesh Effect”Right-click → Add → Mesh Effect applies a shader-driven VFX (fire, ice, electric, and more) to an object’s mesh surface. This option only appears when the selected object (or one of its children) has a mesh renderer. Picking it opens the Asset Catalog filtered to the Mesh Effect tab; clicking Import on an effect adds it as a child scene object. See the Mesh Effects guide for the full workflow, limitations, and tips.
Searching and Filtering
Section titled “Searching and Filtering”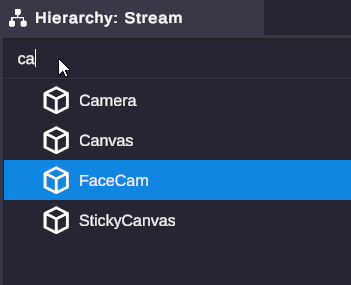
Type in the search box at the top of the Hierarchy to filter objects by name.
- Search is case-insensitive
- Only matching objects are shown
- Results appear in a flat list (hierarchy structure hidden during search)
- Clear the search to return to normal view
ItemTag System
Section titled “ItemTag System”Every scene object has a unique identifier called an ItemTag. This is different from the object’s display name.
Why ItemTags Matter
Section titled “Why ItemTags Matter”Node graphs use ItemTags to reference specific objects. When you use an Object Selector in a node graph, you’re selecting by ItemTag, not by name.
ItemTag Format
Section titled “ItemTag Format”ItemTags can be any text, as long as they are unique within your scene. You might use descriptive tags like MainCamera, AlertBox_1, or StreamerAvatar.
ItemTag Persistence
Section titled “ItemTag Persistence”ItemTags remain constant even if you rename the object. This means:
- Node graphs continue working after renaming
- Saved scenes maintain correct references
- Duplicated objects get new unique ItemTags
See Variables nodes for how to use object references in node graphs.
Special Features
Section titled “Special Features”Linked to Model
Section titled “Linked to Model”Objects imported from 3D model files show a link indicator. These objects maintain their connection to the source model structure.
To break this connection and edit freely:
- Right-click → Model → Unlink
This removes the link to the source model and allows free editing.
Expand/Collapse Memory
Section titled “Expand/Collapse Memory”The Hierarchy remembers which objects are expanded or collapsed for each scene. This state persists when switching between scenes.
🎯 Naming Convention: Use clear, descriptive names like “Celebration_Confetti” instead of “Particle System (1)”. Your future self (and node graphs) will thank you.
🎯 Group by Function: Create empty objects as folders to organize related items: “Lighting”, “Cameras”, “Alert_Effects”, etc.
🎯 Parent for Movement: If multiple objects need to move together, parent them to an empty object and animate the parent.
🎯 Search First: Before scrolling through a large hierarchy, use search to jump directly to what you need.
Related
Section titled “Related”- Scene Objects - Understanding scene objects
- Inspector - Editing object properties
- Variables Nodes - Referencing objects in node graphs