Scene
Scene nodes manipulate the 3D objects in your scene - moving, spawning, parenting, and destroying them, or driving them with physics forces. Reach for these whenever something needs to happen on screen.
AddExplosionForce
Section titled “AddExplosionForce”💡 Simple Explanation: Creates an explosion force that pushes objects away from a point. Perfect for blast effects, ragdolls, or launching objects in all directions.
⚙️ Technical Description: Applies an explosive radial force emanating from a specified position, affecting objects within a radius. Automatically adds Rigidbody if missing.
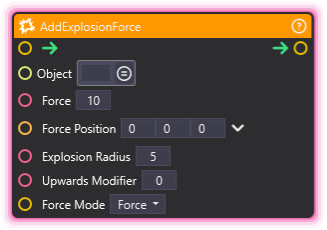
🔍 Full Details & Examples
🔧 How It Works: Applies physics force radiating outward from the explosion center. Objects closer to the center get pushed harder than those farther away. The upward modifier adds extra vertical lift for more dramatic effects.
✨ Perfect For:
- Explosion effects when objects are destroyed
- Launching confetti or particles outward
- Ragdoll knockback effects
- Impact reactions from projectiles
👉 Inputs:
- (SceneObject) - Object to affect
Force(Float) - How strong the explosion push isForce Position(Vector3) - Where the explosion happensExplosion Radius(Float) - How far the explosion reachesUpwards Modifier(Float) - Extra upward force (for bouncy explosions)Force Mode(Dropdown) - How to apply the force (Impulse, Force, etc.)
🎬 Streaming Example: “When a viewer triggers a special alert, spawn objects around a point then use AddExplosionForce to blast them outward dramatically.”
🎯 Tips: The node automatically adds a Rigidbody to the object if it doesn’t have one. Larger radius and force values create more dramatic effects!
AddForce
Section titled “AddForce”💡 Simple Explanation: Pushes, pulls, or spins objects using physics. Can apply force in different ways - straight push, spin, or force from a specific point.
⚙️ Technical Description: Applies various physics force types to a Rigidbody, including standard force, relative force, torque, and force at position. Automatically adds and configures Rigidbody if missing.
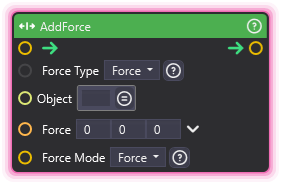
🔍 Full Details & Examples
🔧 How It Works: Applies physics-based force to an object. You can push it in a direction, apply spinning force (torque), or push from a specific location. The force mode controls whether it’s instant (impulse) or continuous.
✨ Perfect For:
- Launching objects in a specific direction
- Adding spin or rotation to objects
- Wind or gravity-like effects
- Physics-based reactions to events
👉 Inputs:
Force Type(Dropdown) - Force, RelativeForce, Torque, or ForceAtPosition- (SceneObject) - Object to apply force to
Force(Vector3) - Direction and strength of forceForce Mode(Dropdown) - Impulse (instant) or Force (continuous)
🎬 Streaming Example: “When donations hit a threshold, apply upward force to scene objects making them float or bounce around for a celebration effect.”
🎯 Tips: Use Impulse for instant kicks (like explosions), Force for continuous push (like wind). Torque spins objects around their center.
ChangeRotationWithPhysics
Section titled “ChangeRotationWithPhysics”💡 Simple Explanation: Rotates an object smoothly through the physics system. Better than direct rotation when you want physics interactions to work properly.
⚙️ Technical Description: Changes a Rigidbody’s rotation through the physics system using Rigidbody.MoveRotation() for smooth, physics-compliant rotation.
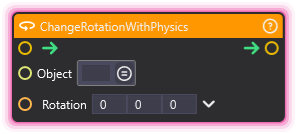
🔍 Full Details & Examples
🔧 How It Works: Sets the object’s rotation through the physics engine instead of directly changing it. This ensures the rotation plays nicely with other physics interactions and collisions.
✨ Perfect For:
- Rotating physics-enabled objects smoothly
- Spinning platforms or obstacles
- Orienting objects without breaking physics
- Animated rotations that need physics
👉 Inputs:
scene_object(SceneObject) - Object to rotaterotation(Vector3) - New rotation angles (Euler angles: X, Y, Z)
🎬 Streaming Example: “Slowly rotate a platform that viewers are standing on, using physics rotation so they move with it naturally.”
🎯 Tips: Requires the object to already have a Rigidbody component. For instant rotation without physics, use animation nodes or direct transform manipulation instead.
GetTransform
Section titled “GetTransform”💡 Simple Explanation: Reads where an object is, how it’s rotated, and how big it is. Like asking “where are you and what do you look like right now?”
⚙️ Technical Description: Retrieves the position, rotation, and scale of a Scene Object in either local or world space coordinates.
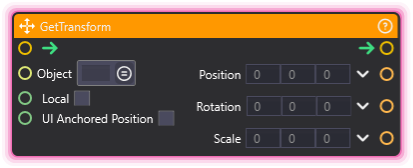
🔍 Full Details & Examples
🔧 How It Works: Outputs the object’s current position (where it is), rotation (which way it’s facing), and scale (how big it is). You can get either world coordinates (position in the scene) or local coordinates (position relative to parent).
✨ Perfect For:
- Checking object positions for conditional logic
- Copying transform data from one object to another
- Recording object states
- Position-based triggers
👉 Inputs:
- (SceneObject) - Object to read from
Local(Boolean) - True for local space, false for world space
👈 Outputs:
Position(Vector3) - Where the object isRotation(Vector3) - How it’s rotated (Euler angles)Scale(Vector3) - How big it is
🎬 Streaming Example: “Read a camera’s position every second and save it to display the ‘camera has moved X meters’ stat overlay.”
🎯 Tips: World space is position in the scene, local space is position relative to the parent object. Use local when dealing with child objects in hierarchies.
SetTransform
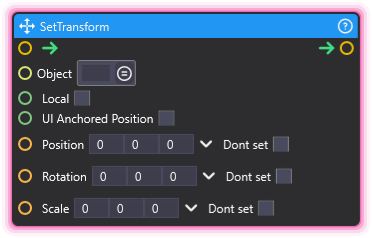
Section titled “SetTransform”💡 Simple Explanation: Moves, rotates, or resizes an object to exact values. Like telling an object “go here, face this way, and be this big.”
⚙️ Technical Description: Sets the position, rotation, and/or scale of a Scene Object in either local or world space coordinates.
🔍 Full Details & Examples
🔧 How It Works: Directly sets the object’s position (where it is), rotation (which way it’s facing), and scale (how big it is). You can set values in world coordinates (absolute position in the scene) or local coordinates (relative to the parent object).
✨ Perfect For:
- Teleporting objects to specific positions
- Resetting object transforms to known states
- Syncing one object’s transform to another
- Setting up initial positions for spawned objects
👉 Inputs:
- (SceneObject) - Object to transform
Position(Vector3) - Where to place the objectRotation(Vector3) - How to rotate the object (Euler angles)Scale(Vector3) - How to size the objectLocal(Boolean) - True for local space, false for world space
🎬 Streaming Example: “When a viewer redeems a channel point reward, teleport their avatar to center stage by setting its position to (0, 0, 0).”
🎯 Tips: Use with GetTransform to copy one object’s transform to another. World space sets absolute position; local space sets position relative to the parent object.
GetTransformDirection
Section titled “GetTransformDirection”💡 Simple Explanation: Gets which way an object is pointing. Like asking “which way is your front?” or “which way is your left side facing?”
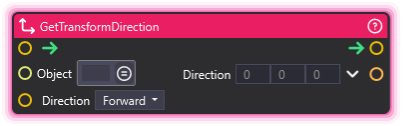
⚙️ Technical Description: Retrieves a directional vector (forward, back, left, right, up, down) relative to a Scene Object’s current orientation in world space.
🔍 Full Details & Examples
🔧 How It Works: Based on how the object is rotated, this outputs a direction vector pointing forward, backward, left, right, up, or down from the object’s perspective. Useful for moving objects in the direction they’re facing.
✨ Perfect For:
- Moving objects forward based on their rotation
- Shooting projectiles in the direction something is facing
- Following or tracking movement
- Camera look-at directions
👉 Inputs:
Object(SceneObject) - Object to use as referenceDirection(Enum) - Forward, Back, Left, Right, Up, or Down
👈 Outputs:
Direction(Vector3) - World-space direction vector
🎬 Streaming Example: “Get a camera’s forward direction and use it to spawn a particle effect that moves in the direction the camera is looking.”
🎯 Tips: The direction is always relative to the object’s rotation, not the world. “Forward” means where the object’s front is pointing, which changes as it rotates. The object is looked up on every run: if it cannot be found, the node logs a warning, leaves the Direction output as it was, and the flow continues. A Direction that is not one of the six names exactly as listed (wired text such as “forward” or “99”, for example) logs a warning and uses the dropdown selection instead, or Forward if that names none either. A wired value that is not text is ignored: the dropdown selection is used and nothing is logged.
MovePositionWithPhysics
Section titled “MovePositionWithPhysics”💡 Simple Explanation: Moves an object to a new position through the physics system. Better for physics objects than teleporting, keeps collisions working correctly.
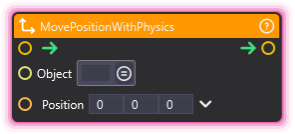
⚙️ Technical Description: Moves a Rigidbody to a target position using Rigidbody.MovePosition() for physics-compliant movement.
🔍 Full Details & Examples
🔧 How It Works: Instead of instantly teleporting the object, this moves it through the physics system so it still collides with things properly and interacts with other physics objects along the way.
✨ Perfect For:
- Moving physics-enabled characters or objects
- Kinematic object movement
- Platforms that need to push other objects
- Smooth physics-based repositioning
👉 Inputs:
scene_object(SceneObject) - Object to moveposition(Vector3) - Where to move it to
🎬 Streaming Example: “Move a platform to a new position smoothly, pushing any objects sitting on top of it along with the movement.”
🎯 Tips: Requires the object to already have a Rigidbody component. This is the “proper” way to move physics objects - teleporting them directly can break physics interactions.
OnObjectCollision
Section titled “OnObjectCollision”💡 Simple Explanation: Watches for when an object bumps into something else or enters a trigger zone. Tells you what it hit and how hard.
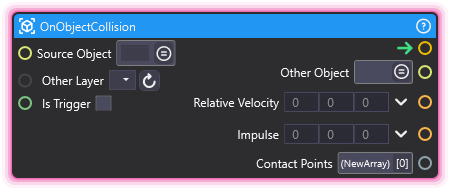
⚙️ Technical Description: Detects collision or trigger events on a Scene Object, outputting information about the colliding object, impact velocity, impulse, and contact points. Requires physics component.
🔍 Full Details & Examples
🔧 How It Works: Continuously monitors the object for physics collisions or trigger zone entries. When a collision happens, it outputs details like what object it hit, how fast it was going, and where the contact occurred.
✨ Perfect For:
- Triggering effects when objects collide
- Detecting when viewers’ avatars enter zones
- Impact-based sound or particle effects
- Button or interaction triggers
👉 Inputs:
scene_object(SceneObject) - Object to watch for collisionsis_trigger(Boolean) - True for trigger zones, false for physical collisions
👈 Outputs:
other(SceneObject) - The object that was hitrelative_velocity(Vector3) - How fast the collision wasimpulse(Vector3) - Force of the impactcontact_points(Array) - Where the objects touched
🎬 Streaming Example: “When a spawned object hits a target zone, trigger a celebration particle effect and increment a score counter.”
🎯 Tips: The object needs a Rigidbody to detect collisions. Trigger zones let objects pass through but still detect entry, while collisions are physical bumps.
ParticlesClear
Section titled “ParticlesClear”💡 Simple Explanation: Instantly removes all visible particles from an effect. Like hitting a delete button on the particles currently showing.
⚙️ Technical Description: Immediately clears all particles from a particle system by calling Clear().
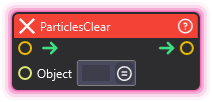
🔍 Full Details & Examples
🔧 How It Works: Removes all existing particles immediately, leaving the particle system empty. Useful for instant cleanup when you need particles to vanish right away instead of fading out naturally.
✨ Perfect For:
- Instant cleanup when switching scenes
- Clearing particles when an effect is interrupted
- Reset button functionality
- Emergency particle removal
👉 Inputs:
scene_object(SceneObject) - Object with the particle system
🎬 Streaming Example: “When a viewer cancels an effect with a chat command, instantly clear all active celebration particles.”
🎯 Tips: Unlike ParticlesStop which lets existing particles finish their lifetime, Clear removes them instantly. Use this for immediate removal.
ParticlesPause
Section titled “ParticlesPause”💡 Simple Explanation: Freezes particles in mid-air. Like hitting pause on a video - everything stops but stays visible.
⚙️ Technical Description: Pauses a particle system, freezing all particles in place without removing them.
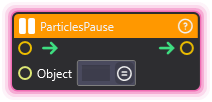
🔍 Full Details & Examples
🔧 How It Works: Pauses the particle system, stopping particles from moving or updating but keeping them visible at their current positions. Resume with ParticlesPlay.
✨ Perfect For:
- Freeze-frame effects
- Pausing effects during loading or transitions
- Creating “time stop” visual effects
- Temporary effect suspension
👉 Inputs:
scene_object(SceneObject) - Object with the particle system
🎬 Streaming Example: “When a ‘freeze time’ alert triggers, pause all active particle effects to create a frozen moment, then resume after 2 seconds.”
🎯 Tips: Particles stay visible when paused. Use ParticlesStop to let them finish gracefully, or ParticlesClear to remove them entirely.
ParticlesPlay
Section titled “ParticlesPlay”💡 Simple Explanation: Starts a particle effect playing. Like pressing the play button to begin the visual effect.
⚙️ Technical Description: Starts or resumes a particle system by setting PlayTrigger = true on the ParticlePlayer component.
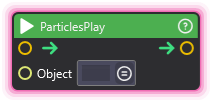
🔍 Full Details & Examples
🔧 How It Works: Triggers the particle system to begin emitting particles according to its settings. If paused, it resumes from where it left off.
✨ Perfect For:
- Starting celebration effects
- Triggering VFX on events
- Beginning looping particle effects
- Resuming paused particles
👉 Inputs:
scene_object(SceneObject) - Object with the particle system
🎬 Streaming Example: “When a donation comes in, play a confetti particle effect that emits for 3 seconds then automatically stops.”
🎯 Tips: Most particle systems can be set to play once or loop. Check the particle system settings to control duration and behavior.
ParticlesStop
Section titled “ParticlesStop”💡 Simple Explanation: Stops making new particles, but lets the ones already showing finish fading out naturally. Graceful shutdown.
⚙️ Technical Description: Stops a particle system from emitting new particles, allowing existing particles to complete their lifetime naturally.
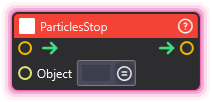
🔍 Full Details & Examples
🔧 How It Works: Stops the particle system from creating new particles, but existing particles continue their animation until they naturally fade away or reach the end of their lifetime.
✨ Perfect For:
- Gracefully ending looping effects
- Letting effects finish naturally
- Stopping particle emission while maintaining visual smoothness
- Clean transitions between effects
👉 Inputs:
scene_object(SceneObject) - Object with the particle system
🎬 Streaming Example: “After a 10-second celebration effect, stop the confetti emitter so it gradually fades out instead of vanishing abruptly.”
🎯 Tips: This is the “nice” way to end particles. Use ParticlesClear if you need them gone instantly. You can always ParticlesPlay again to restart.
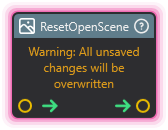
ResetOpenScene
Section titled “ResetOpenScene”💡 Simple Explanation: Hits the reset button on your scene. Everything goes back to how it was when you first saved the reset state.
⚙️ Technical Description: Reloads the current scene asynchronously to restore it to its saved reset state.
🔍 Full Details & Examples
🔧 How It Works: Reloads the current scene asynchronously, restoring all objects to their saved positions, states, and configurations from the last reset save point.
✨ Perfect For:
- Quick scene resets during testing
- Undo all changes made during a session
- Resetting interactive elements to defaults
- “Start over” functionality
🎬 Streaming Example: “Add a ‘Reset Scene’ button that viewers can trigger to reset all interactive elements back to their starting positions after a chaotic segment.”
🎯 Tips: The scene reloads to its saved state, not necessarily the original. Make sure you’ve saved a reset state you’re happy with before using this.
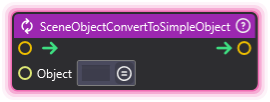
SceneObjectConvertToSimpleObject
Section titled “SceneObjectConvertToSimpleObject”💡 Simple Explanation: Breaks an object’s connection to its template (Bundled Asset) so it becomes its own independent thing. Like making a copy that’s no longer linked to the original.
⚙️ Technical Description: Converts a complex Bundled-Asset-linked object into a simple standalone Scene Object by breaking Bundled Asset connections and simplifying structure.
🔍 Full Details & Examples
🔧 How It Works: Detaches the object from its Bundled Asset instance, making it a standalone Scene Object that won’t be affected by Bundled Asset changes. Simplifies the object structure for better performance or easier editing.
✨ Perfect For:
- Breaking Bundled Asset links for custom modifications
- Optimizing complex Bundled Asset instances
- Creating unique variants from templates
- Preventing unwanted Bundled Asset updates
👉 Inputs:
scene_object(SceneObject) - Object to convert
🎬 Streaming Example: “When a spawned prop is modified by viewer interaction, convert it to a simple object so it stays unique and isn’t reset by Bundled Asset changes.”
🎯 Tips: Use this when you want an object to be permanently different from its Bundled Asset. Once converted, it won’t receive Bundled Asset updates.
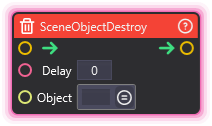
SceneObjectDestroy
Section titled “SceneObjectDestroy”💡 Simple Explanation: Deletes an object from your scene, either instantly or after a delay. Useful for cleanup and timed removal.
⚙️ Technical Description: Destroys a Scene Object after an optional delay period, with warning logging if the object is not found or already destroyed.
🔍 Full Details & Examples
🔧 How It Works: Finds the specified object and destroys it. If you set a delay, it waits that many seconds before destruction. Logs a warning if the object doesn’t exist or was already destroyed.
✨ Perfect For:
- Cleaning up spawned objects
- Timed destruction effects (destroy after 5 seconds)
- Removing temporary objects
- Cleanup after events finish
👉 Inputs:
Delay(Float) - Seconds to wait before destroying (0 for instant)Object(SceneObject) - Object to destroy
🎬 Streaming Example: “When a celebration effect finishes, wait 3 seconds then destroy all the confetti objects to keep the scene clean.”
🎯 Tips: Set delay to 0 for instant removal. Use a delay to let particle effects or animations finish before the object disappears.
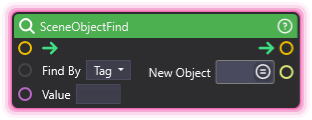
SceneObjectFind
Section titled “SceneObjectFind”💡 Simple Explanation: Searches for an object in your scene by its name or tag. Like using “Find” in a document to locate something specific.
⚙️ Technical Description: Locates a Scene Object in the current scene by tag or name, outputting the found object or logging a warning if not found.
🔍 Full Details & Examples
🔧 How It Works: Searches through all objects in the scene looking for one that matches the specified name or tag. Returns the first matching object found, or logs a warning if nothing matches.
✨ Perfect For:
- Dynamically locating objects at runtime
- Finding objects without direct references
- Flexible object targeting
- Scene scanning
👉 Inputs:
method(Enum) - Search “ByTag” or “ByName”tag/name(String) - What to search for
👈 Outputs:
scene_object(SceneObject) - The found object (empty if not found)
🎬 Streaming Example: “When a chat command triggers, find the object tagged ‘spotlight’ and move it to highlight the viewer’s chosen area.”
🎯 Tips: Tags are faster for searching and allow multiple objects to share the same identifier. Names must be unique or you’ll only get the first match.
SceneObjectGetChild
Section titled “SceneObjectGetChild”💡 Simple Explanation: Gets a specific child object from a parent by counting position. Like saying “give me the 3rd child of this object.”
⚙️ Technical Description: Retrieves a specific child Scene Object by index from a parent’s child list, returning empty if index is out of bounds.
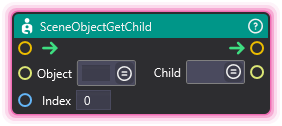
🔍 Full Details & Examples
🔧 How It Works: Looks at the parent object’s children list and returns the child at the specified index (starting from 0). If the index is too high or low, returns empty instead of erroring.
✨ Perfect For:
- Iterating through an object’s children
- Accessing specific child positions
- Building loops that process hierarchies
- Systematic child access
👉 Inputs:
parent(SceneObject) - Parent objectindex(Integer) - Which child to get (0 = first child)
👈 Outputs:
child(SceneObject) - The child object at that index
🎬 Streaming Example: “Use a for-loop to go through each child of a container object, moving them one by one to create a cascading animation.”
🎯 Tips: Child index starts at 0 (first child = 0, second = 1, etc.). Check SceneObjectGetChildCount first to know how many children exist.
SceneObjectGetChildCount
Section titled “SceneObjectGetChildCount”💡 Simple Explanation: Counts how many child objects something has. Like asking “how many items are in this folder?”
⚙️ Technical Description: Returns the number of direct children attached to a Scene Object.
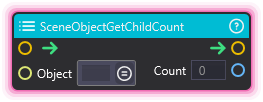
🔍 Full Details & Examples
🔧 How It Works: Counts all direct children of the parent object and returns that number. Only counts immediate children, not grandchildren or deeper descendants.
✨ Perfect For:
- Determining loop bounds for child iteration
- Validating object hierarchies
- Checking if an object has children
- Dynamic child processing
👉 Inputs:
parent(SceneObject) - Object to count children of
👈 Outputs:
count(Integer) - Number of direct children
🎬 Streaming Example: “Check how many particle emitters are children of the ‘effects container’, then trigger each one with a small delay between them.”
🎯 Tips: Use this with ForLoop to iterate through all children safely. The count only includes direct children, not nested grandchildren.
SceneObjectGetChildren
Section titled “SceneObjectGetChildren”💡 Simple Explanation: Returns ALL children of a Scene Object as an array of tags. Optionally walks the entire descendant tree, not just direct children.
⚙️ Technical Description: Synchronous node that resolves the parent Scene Object via Converters.ToSceneObjectFromTag, then collects either direct children (ExposeToEditor.GetChildren) or every descendant (ExposeToEditor.GetAllChildrenRecursively) based on the deep_search Boolean. The result is written to a String Array port whose entries hold each child’s ItemTag.
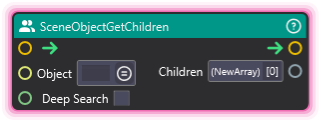
🔍 Full Details & Examples
🔧 How It Works: Looks up the parent Scene Object by tag, then either lists direct children only (Deep Search off) or walks the full hierarchy and returns every descendant at every depth (Deep Search on). Each child is written to the output array as a tag String.
✨ Perfect For:
- Bulk-processing every child of a parent
- Hierarchy traversal and inspection
- Container-style scene queries
- Driving per-child loops with
ForLoop
👉 Inputs:
Object(ObjectSelector) - Parent Scene Object whose children should be listedDeep Search(Boolean) - When false, returns only direct children. When true, returns every descendant at every depth.
👈 Outputs:
Children(Array) - String Array of child Scene Object tags
🎬 Streaming Example: “List every child of an ‘effects’ container at scene start, then iterate them with a for-loop to trigger each particle system one by one for a cascading reveal.”
🎯 Tips: Use SceneObjectGetChild for indexed single-child access, or SceneObjectGetChildCount when you only need the count.
SceneObjectGetParent
Section titled “SceneObjectGetParent”💡 Simple Explanation: Finds the parent of an object. Like asking “what folder is this file in?” Returns nothing if it’s at the top level.
⚙️ Technical Description: Retrieves the parent Scene Object of a specified object, returning empty if the object has no parent.
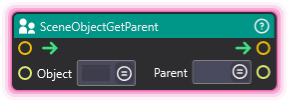
🔍 Full Details & Examples
🔧 How It Works: Looks up the hierarchy and returns the immediate parent of the object. If the object is at the root level (no parent), returns empty.
✨ Perfect For:
- Navigating up object hierarchies
- Finding container objects
- Hierarchy validation
- Parent-based logic
👉 Inputs:
scene_object(SceneObject) - Child object to get parent of
👈 Outputs:
parent(SceneObject) - Parent object (empty if none)
🎬 Streaming Example: “When an interactive object is clicked, get its parent container and highlight all objects in that group.”
🎯 Tips: Objects at the scene root have no parent. Use this to navigate up hierarchies or find containing groups.
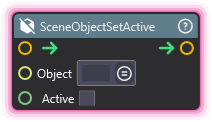
SceneObjectSetActive
Section titled “SceneObjectSetActive”💡 Simple Explanation: Turns objects on or off in your scene. Like a light switch for making things visible/invisible and functional/non-functional.
⚙️ Technical Description: Enables or disables a Scene Object in the scene, making it visible/invisible and active/inactive.
🔍 Full Details & Examples
🔧 How It Works: Takes an object and a true/false value, then shows or hides that object. When disabled, objects become invisible and their scripts stop running.
✨ Perfect For:
- Hiding overlay elements until a viewer action triggers them
- Toggling UI panels on and off based on stream events
- Creating timed reveals (show an object, wait, then hide it)
- Activating particle effects only when needed
👉 Inputs:
- (SceneObject) - Target object to enable/disable
Active(Boolean) - True to show, false to hide
🎬 Streaming Example: “When a viewer donates, activate a special thank-you particle effect for 5 seconds, then deactivate it again.”
🎯 Tips: Disabled objects don’t process any logic, making this more efficient than just making things invisible. Commonly paired with Timer or Delay nodes.
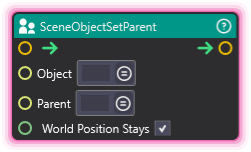
SceneObjectSetParent
Section titled “SceneObjectSetParent”💡 Simple Explanation: Attaches one object to another so they move together. Like putting a hat on a character - the hat becomes a child and follows the parent around.
⚙️ Technical Description: Changes the parent-child relationship of Scene Objects in the scene hierarchy.
🔍 Full Details & Examples
🔧 How It Works: Takes a child object and a parent object, then links them together. The child will follow the parent’s position, rotation, and scale. Pass an empty parent to unlink an object.
✨ Perfect For:
- Attaching spawned objects to moving platforms or characters
- Building dynamic object groups that move as one unit
- Creating multi-part effects that stay synchronized
- Organizing spawned items under container objects
👉 Inputs:
object(SceneObject) - Child object to attachparent(SceneObject) - Parent object (empty to detach)
🎬 Streaming Example: “When spawning donation badges, parent them to a rotating display board so they all spin together as a group.”
🎯 Tips: Setting parent to empty/null places the object at the scene root. World position is maintained by default (doesn’t snap to parent’s center).
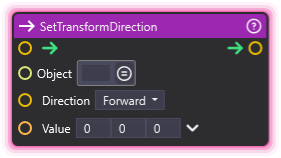
SetTransformDirection
Section titled “SetTransformDirection”💡 Simple Explanation: Points an object in a specific direction. Like rotating a character to face north, or tilting a camera upward.
⚙️ Technical Description: Sets a Scene Object’s rotation by aligning one of its directional axes (forward, back, up, down, left, right) with a specified direction vector.
🔍 Full Details & Examples
🔧 How It Works: Pick which direction of the object you want to control (forward, up, right, etc.) and provide a direction vector. The object rotates so that axis points in your chosen direction.
✨ Perfect For:
- Making objects face specific directions without calculating angles
- Orienting spawned items based on scene data
- Aligning UI elements or indicators toward targets
- Setting up initial orientations for animations
👉 Inputs:
object(SceneObject) - Object to rotatedirection(Enum) - Which axis to align (Forward, Back, Up, Down, Left, Right)input_direction(Vector3) - Direction vector to align with
🎬 Streaming Example: “When spawning a new arrow indicator, set its forward direction to point toward the latest donation goal marker.”
🎯 Tips: Common direction vectors: (0,1,0) for up, (1,0,0) for right, (0,0,1) for forward. Can be combined with GetTransformDirection for relative positioning.
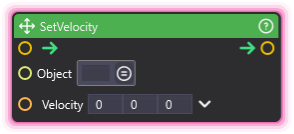
SetVelocity
Section titled “SetVelocity”💡 Simple Explanation: Launches or pushes physics objects in a direction at a specific speed. Like throwing a ball or shooting a projectile.
⚙️ Technical Description: Sets the linear velocity of a Scene Object’s physics component. Automatically adds physics if missing and enables physics simulation.
🔍 Full Details & Examples
🔧 How It Works: Applies a velocity vector to an object with physics enabled. The object will move continuously in that direction until other forces (like gravity or collisions) change its motion. Automatically sets up the object for physics if needed.
✨ Perfect For:
- Launching projectiles when viewers trigger events
- Resetting object motion to a specific speed
- Creating physics-based effects that respond to stream interactions
- Simulating thrown or falling objects
👉 Inputs:
object(SceneObject) - Object to apply velocity tovelocity(Vector3) - Direction and speed (units per second)
🎬 Streaming Example: “When someone bits 100, spawn a coin and set its velocity upward (0, 10, 0) to make it fly into the air before falling back down.”
🎯 Tips: Automatically adds Rigidbody component if missing and warns you. Disables isKinematic automatically. Velocity is continuous until changed by forces.
Spawner
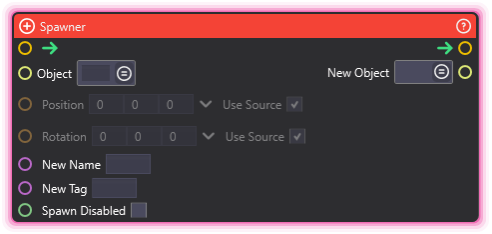
Section titled “Spawner”💡 Simple Explanation: Creates copies of objects on the fly. Perfect for spawning effects, duplicating items, or generating things based on viewer interactions.
⚙️ Technical Description: Instantiates new Scene Objects from Bundled Assets or duplicates existing scene objects at runtime. Supports both asset Bundled Assets and scene object duplication with configurable position, rotation, name, and tag.
🔍 Full Details & Examples
🔧 How It Works: Takes either a Bundled Asset from your assets or an existing scene object and creates a new copy of it. You can set where it appears, how it’s rotated, and give it a custom name and tag for later reference.
✨ Perfect For:
- Spawning particle effects when viewers donate or subscribe
- Creating multiple copies of objects for crowd effects
- Generating badges, icons, or visual rewards on demand
- Building dynamic scenes that change based on stream events
👉 Inputs:
Object(ObjectSelector) - Source object to spawn (Bundled Asset or scene object)Position(Vector3, optional) - Where to spawn (defaults to source position)Rotation(Vector3, optional) - Rotation in Euler angles (defaults to source rotation)New Name(String) - Name for the spawned object (optional)New Tag(String) - Unique tag for referencing later (optional)Spawn Disabled(Boolean) - Spawn inactive/hidden
👈 Outputs:
New Object(ObjectSelector) - Reference to the newly spawned object
🎬 Streaming Example: “Every time someone subscribes, spawn a floating badge Bundled Asset at position (0, 5, 0), give it the tag ‘latest_sub’, then tween it upward over 3 seconds.”
🎯 Tips: Works with both scene objects and asset Bundled Assets. Output tag lets you reference the spawned object in subsequent nodes. Spawning disabled is useful when you want to set up the object before showing it.
SwitchScene
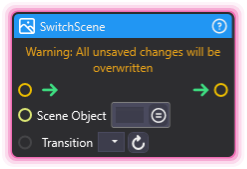
Section titled “SwitchScene”💡 Simple Explanation: Switches to a different scene in your project. Think of it like changing camera views or switching between different overlay setups during a stream.
⚙️ Technical Description: Asynchronously loads a different scene with optional transition effects. Supports broadcast-style stinger transitions for professional scene switching.
🔍 Full Details & Examples
🔧 How It Works: Unloads the current scene and loads a new one. You can add smooth transitions (like fades or custom stinger animations) to make scene changes look professional rather than abrupt cuts.
✨ Perfect For:
- Switching between different stream overlay configurations
- Changing from a main scene to an “intermission” or “BRB” scene
- Creating multi-scene workflows for different stream segments
- Professional broadcast-style scene transitions
👉 Inputs:
- (Scene) - Target scene to load
Transition(Dropdown) - Transition effect type (None, or custom transitions)
🎬 Streaming Example: “When you press a Stream Deck button, switch from your main scene to your ‘chatting’ scene with a 1-second fade transition.”
🎯 Tips: Make sure the target scene is added to your project’s build settings or scene list. Transitions can hide the loading process for a smoother viewer experience.
OnSceneSetActive
Section titled “OnSceneSetActive”💡 Simple Explanation: Listens for when a scene becomes the active one and fires your graph. Like a doorbell that rings the moment a new scene takes the stage.
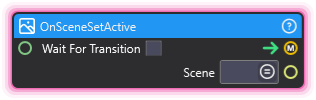
⚙️ Technical Description: UpdaterNode that subscribes to the runtime’s scene-activation event and fires its output trigger when a scene becomes active, optionally waiting until a stinger transition finishes.
🔍 Full Details & Examples
🔧 How It Works: When a scene is set active, this node fires its output trigger and outputs a reference to the activated scene. With Wait For Transition off, it fires the instant the scene activates. With it on, it waits until the stinger transition finishes, and still fires once on a direct switch that has no transition.
✨ Perfect For:
- Kicking off setup logic when a scene goes live
- Starting timers or effects on scene entry
- Reacting to broadcast-style scene switches
- Routing logic by which scene just activated
👉 Inputs:
Wait For Transition(Boolean) - When on, fires after the stinger transition completes
👈 Outputs:
Scene(ObjectSelector) - the scene that became active
🎬 Streaming Example: “When your ‘BRB’ scene becomes active, wait for the stinger to finish then start a countdown timer that tells viewers when you’ll be back.”
🎯 Tips: Turn on Wait For Transition when you only want logic to run after a stinger finishes hiding the swap. Pair with SwitchScene to drive scene changes that this node reacts to.
OnSceneSetInactive
Section titled “OnSceneSetInactive”💡 Simple Explanation: Listens for when a scene goes inactive and fires your graph. Like a stagehand that flips a switch the moment a scene leaves the spotlight.
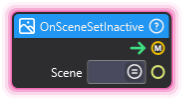
⚙️ Technical Description: UpdaterNode that subscribes to the runtime’s scene-deactivation event and fires its output trigger when a scene goes inactive.
🔍 Full Details & Examples
🔧 How It Works: When a scene goes inactive, this node fires its output trigger and outputs a reference to the deactivated scene. It fires once each time a scene leaves the active slot, including during scene switches with a stinger transition.
✨ Perfect For:
- Cleaning up effects when a scene leaves
- Stopping timers or audio on scene exit
- Saving state before a scene change
- Routing logic by which scene just deactivated
👈 Outputs:
Scene(ObjectSelector) - the scene that went inactive
🎬 Streaming Example: “When your ‘Starting Soon’ scene goes inactive, stop the lobby music and clear the countdown overlay before your main scene takes over.”
🎯 Tips: Use with OnSceneSetActive to bookend setup and teardown around a scene switch. Pair with SwitchScene to drive the changes this node reacts to.
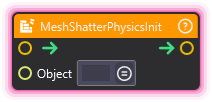
MeshShatterPhysicsInit
Section titled “MeshShatterPhysicsInit”💡 Simple Explanation: Sets an object up for physics shattering ahead of time, so a later node can drop it or break it apart.
⚙️ Technical Description: Adds a Mesh Shatter component in physics mode when missing and sets up the object’s physics shatter body (the same setup as the component’s Initialize button), applying the component’s Simulation Type.
🔍 Full Details & Examples
🔧 How It Works: A 3D Text or Dynamic Shadow Box object is first converted in place, with no confirmation and no undo, into one plain mesh: its 3D Text or Dynamic Shadow Box component, and any Animator or Animation component, is removed, the meshes of the object and its child objects are combined onto the object, and every child object is deleted, so it is set up as one body. Then the node settles the component’s Object Type: an object with no renderer but with child objects becomes Mesh Root, and a Mesh Root with no child objects becomes Mesh. On a Mesh Root, each active child object that carries a mesh is set up as its own piece; a piece whose mesh is a skinned mesh (the SkinnedMeshRenderer of a rigged model) gets no physics body and stays put. With the default Simulation Type of Dynamic, the object starts falling under gravity right away; set Simulation Type to Inactive or Kinematic first to hold it in place until MeshShatterPhysicsActivate. Nothing is set up, and the node logs a warning instead, for an object that carries no mesh (an empty object with no child objects, or one whose renderer holds no mesh, such as a particle, sprite, line or trail renderer), for a Mesh Root none of whose child objects carries a mesh yet, for an object whose meshes are all skinned meshes, which get no physics body (MeshShatterPhysicsDemo still breaks it apart), and for an object whose physics body a fade with the Sim Exclude Type removed (remove its Mesh Shatter component, and the next Physics Init adds a fresh one). A failure during the setup is logged as a warning too.
✨ Perfect For:
- Setting up destructible objects at scene start
- Holding breakable props in place until they are activated
- Dynamic destruction effects
👉 Inputs:
Object(SceneObject) - Object to set up for physics shattering (a Mesh Shatter component is added when missing)
🎬 Streaming Example: “At scene start, initialize the breakable props whose Mesh Shatter Simulation Type is Inactive, so they wait in place until a viewer’s redemption activates them.”
🎯 Tips: Optional: MeshShatterPhysicsActivate and MeshShatterPhysicsDemo set the body up themselves when it isn’t set up yet, so run Physics Init when you want the setup done ahead of time. When the object can’t be found or there is nothing to set up, the node logs a warning and the flow continues.
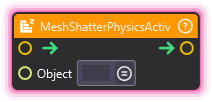
MeshShatterPhysicsActivate
Section titled “MeshShatterPhysicsActivate”💡 Simple Explanation: Lets an object’s physics shatter body move under physics, so it falls and can break apart on impact.
⚙️ Technical Description: Makes the object’s physics shatter body dynamic (the same activation as the Mesh Shatter component’s Activate button), setting the body up first when it isn’t set up yet; on an object whose meshes sit on child objects, each remaining child piece becomes dynamic instead.
🔍 Full Details & Examples
🔧 How It Works: Adds a Mesh Shatter component in physics mode when missing and settles its Object Type as MeshShatterPhysicsInit does. A body held in place by the Simulation Type Inactive or Kinematic starts moving under gravity; on an object whose meshes sit on child objects, each child piece that is active and not yet demolished does, except a piece whose mesh is a skinned mesh or that has no Rigidbody, which stays put. Nothing is activated, and the node logs a warning instead, for what Physics Init refuses, for a body with no Rigidbody (Simulation Type Static, a fade with the Set Static Type, or a removed Rigidbody component), and for an object with no child piece left that can start moving. A failure during the activation is logged as a warning too. If the activated object breaks apart, it drops out of your scene saves; on an object whose meshes sit on child objects, the whole object drops out once any piece breaks.
✨ Perfect For:
- Enabling destruction on specific objects
- Dropping props that were held in place
- Conditional destruction setups
👉 Inputs:
Object(SceneObject) - Object whose physics shatter body becomes dynamic (a Mesh Shatter component is added when missing)
🎬 Streaming Example: “When a viewer donates, activate a glass prop that Physics Init held in place with Simulation Type Inactive, so it falls and shatters on impact.”
🎯 Tips: No Physics Init needed first: Activate sets the body up itself. With the default Simulation Type of Dynamic the object already falls once it is set up, so set Simulation Type to Inactive or Kinematic when you want it to wait for this node. Activate doesn’t break the object apart by itself; use MeshShatterPhysicsDemo to break it apart at once. When the object can’t be found or there is nothing to activate, the node logs a warning and the flow continues.
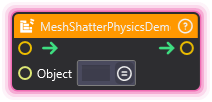
MeshShatterPhysicsDemo
Section titled “MeshShatterPhysicsDemo”💡 Simple Explanation: Triggers the actual shattering effect - the object breaks apart right away with physics simulation.
⚙️ Technical Description: Adds a Mesh Shatter component in physics mode when missing and demolishes the object into physics-simulated fragments in one step (the same demolish as the component’s Demolish button), setting the body up first when it isn’t set up yet; on an object whose meshes sit on child objects, each remaining child piece breaks apart instead.
🔍 Full Details & Examples
🔧 How It Works: Like MeshShatterPhysicsInit, it first converts a 3D Text or Dynamic Shadow Box object in place, with no confirmation and no undo, into one plain mesh (its child objects are deleted), so it breaks apart as one mesh, and settles the component’s Object Type. Then it breaks the object’s own mesh into fragments, each its own physics object that falls and collides, whatever the component’s Simulation Type. On an object whose meshes sit only on child objects (Object Type Mesh Root), each child piece that is active and not yet demolished breaks apart instead. Nothing breaks apart, and the node logs a warning instead, for an object that carries no mesh (an empty object with no child objects, or one whose renderer holds no mesh, such as a particle, sprite, line or trail renderer), for a Mesh Root with no child piece left to break, and for an object whose physics body a fade with the Sim Exclude Type removed. A failure during the demolish is logged as a warning too. Once the object breaks apart, it and its pieces drop out of your scene saves; on an object whose meshes sit on child objects, the whole object drops out, every child piece included.
✨ Perfect For:
- Dramatic destruction effects
- Breaking glass, vases, or props
- Impact reactions
- Celebration effects
👉 Inputs:
Object(SceneObject) - Object to break apart (a Mesh Shatter component is added when missing)
🎬 Streaming Example: “When a viewer triggers a ‘break’ command, demolish a glass trophy on screen with satisfying physics.”
🎯 Tips: No Physics Init needed first. To clear the fragments away afterward, set the Mesh Shatter component’s Fading Type to anything but None before the demolish: with On Demolition on (the default), the fragments then fade by themselves once their Life Time runs out. MeshShatterPhysicsFade doesn’t reach the fragments. When the object can’t be found or there is nothing to demolish, the node logs a warning and the flow continues.
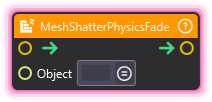
MeshShatterPhysicsFade
Section titled “MeshShatterPhysicsFade”💡 Simple Explanation: Starts an object’s physics shatter fade: after its Life Time, the body is cleared away or stops moving, as the fade settings on its Mesh Shatter component say.
⚙️ Technical Description: Adds a Mesh Shatter component in physics mode when missing and starts the fade on the object’s physics shatter body (the same fade as the component’s Fade button), or on each child piece when only child objects carry meshes.
🔍 Full Details & Examples
🔧 How It Works: Like MeshShatterPhysicsInit, it first settles the component’s Object Type, and unless the Fading Type is None it sets the body up when it isn’t set up yet (with the default Simulation Type of Dynamic the body then starts falling); on an object whose meshes sit only on child objects, each child piece that is active and not yet demolished fades, using the component’s current fade settings even when they changed after the object was set up (a child object with its own Mesh Shatter component uses its own). The body lives on for its Life Time plus a random Life Variation (counted from when it comes to rest if the Life Type is By Simulation And Life Time), then its Fading Type applies: Fall Down, Move Down and Scale Down run over the Fade Time, while Sim Exclude, Destroy, Set Static and Set Kinematic act at once. With the default Fading Type of None, or on an inactive object, nothing happens; a body larger than a nonzero Size Filter, or one whose fade has already started, doesn’t fade, though a body that isn’t set up yet is still set up first. Fragments from MeshShatterPhysicsDemo aren’t faded by this node; they fade through the component’s On Demolition setting. When the fade can’t start (for example, a fade with the Sim Exclude Type already removed the physics body, or an object whose meshes sit on child objects has no child piece left), the node logs a warning. Once the Fading Type applies to the object you connect, that object drops out of your scene saves whatever the Type; while it still lives out its Life Time it saves as before, and with the default Fading Type of None nothing fades and it keeps saving.
✨ Perfect For:
- Clearing activated props out of the scene
- Smooth exits for physics props
- Preventing screen clutter
👉 Inputs:
Object(SceneObject) - Object whose physics shatter body starts fading (a Mesh Shatter component is added when missing)
🎬 Streaming Example: “After a ‘knock it over’ reward drops a prop with Physics Activate, fade it with the Fall Down Type so it sinks out of view before the next segment.”
🎯 Tips: Set the Mesh Shatter component’s Fading Type before running this node: the default None fades nothing. The body waits out its Life Time (7 seconds plus up to 3 more by default) before the Type applies, so viewers still see it for a while. When the object can’t be found or the fade can’t start, the node logs a warning and the flow continues.
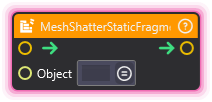
MeshShatterStaticFragment
Section titled “MeshShatterStaticFragment”💡 Simple Explanation: Breaks a mesh into static pieces without physics. Good for stylized fracture effects.
⚙️ Technical Description: Adds a Mesh Shatter component when missing, switches it to static mode and splits the object’s mesh, and the mesh of each active child object, into pieces with no physics that stay in place.
🔍 Full Details & Examples
🔧 How It Works: Splits the mesh into fragments that don’t have physics - they stay where they are instead of falling. The piece count and cut pattern come from the Mesh Shatter component’s own settings for the object’s own mesh, and from default settings for meshes on child objects. Switching a component from physics mode drops its physics settings, but a Rigidbody that a physics shatter node such as MeshShatterPhysicsInit added stays. Running the node again on an object whose own mesh is already fragmented does nothing while the scene stays loaded, unless a physics shatter node has switched the component back to physics mode since; on an object whose meshes sit only on child objects, each run fragments it again, earlier fragments included. Once fragmented, the object and its pieces drop out of your scene saves, and undoing the fragment makes the object save again.
✨ Perfect For:
- Stylized shatter effects
- Frozen-in-time destruction looks
- Performance-friendly breaking
- Abstract visual effects
👉 Inputs:
Object(SceneObject) - Object to break into static pieces (a Mesh Shatter component is added when missing)
🎬 Streaming Example: “Create a dramatic reveal by fragmenting a shell object to expose what’s inside, with pieces floating in place.”
🎯 Tips: No physics simulation means better performance. Use MeshShatterStaticScale afterward to resize every piece at once, or ScaleTween on fragments for animated separation effects. When the object can’t be found, the node logs a warning and the flow continues.
MeshShatterStaticScale
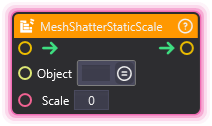
Section titled “MeshShatterStaticScale”💡 Simple Explanation: Resizes every piece of a statically fragmented object at once.
⚙️ Technical Description: Sets one uniform local scale on every renderer under the object other than its own, which after a static fragment include the fragments: each gets the Scale value on all three axes.
🔍 Full Details & Examples
🔧 How It Works: Scales the pieces that are already there, so run it after MeshShatterStaticFragment. It changes the size of each piece, not how many pieces there are, and a later fragment doesn’t reuse the value. Renderers on inactive objects keep their scale, and on an object that isn’t fragmented yet it resizes the meshes of its child objects instead. The node also adds a Mesh Shatter component when missing and switches it to static mode, as Static Fragment does.
✨ Perfect For:
- Controlling fragment size
- Fine-tuning destruction appearance
- Crumbling or reassembling fragmented objects
👉 Inputs:
Object(SceneObject) - Object whose static fragments are resizedScale(Float) - Local scale each piece gets on all three axes
🎬 Streaming Example: “Fragment a ‘1000 SUBS’ banner, then set its pieces’ scale to 0.5 for a crumbling look when the goal is reached.”
🎯 Tips: Call after MeshShatterStaticFragment. Scale sets the size of each piece, not the piece count, which comes from the Mesh Shatter component’s fragment settings. A Scale of 0 shrinks every piece to nothing. When the object can’t be found, the node logs a warning and the flow continues.
TransformLookAt
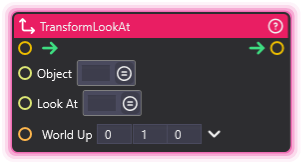
Section titled “TransformLookAt”💡 Simple Explanation: Makes an object face toward another object. Like having a character always look at the camera.
⚙️ Technical Description: Rotates a Scene Object so its forward vector points at a target object, with configurable world-up vector.
🔍 Full Details & Examples
🔧 How It Works: Instantly rotates the object so it faces the target. The world-up vector controls which direction is considered “up” during the rotation.
✨ Perfect For:
- Making cameras track objects
- Characters facing players or points of interest
- Turrets or aiming systems
- UI elements that face the camera
👉 Inputs:
- (SceneObject) - Object to rotate
Look At Object(SceneObject) - Target to look atWorld Up(Vector3) - Up direction (default: 0, 1, 0)
🎬 Streaming Example: “Make a camera always face the active speaker’s avatar during a multi-person stream.”
🎯 Tips: Use with OnNewFrame for continuous tracking. World Up of (0,1,0) keeps the object level. Both objects must exist or node logs a warning.
TransformRotateAround
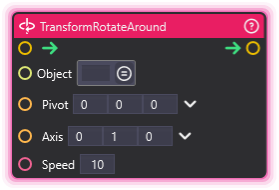
Section titled “TransformRotateAround”💡 Simple Explanation: Rotates an object around a point in space, like orbiting a planet.
⚙️ Technical Description: Rotates a Scene Object around a specified pivot point and axis at a given speed.
🔍 Full Details & Examples
🔧 How It Works: Each execution rotates the object by the specified speed (in degrees) around the pivot point along the given axis.
✨ Perfect For:
- Orbital camera movements
- Spinning objects around a center point
- Carousel effects
- Planetary motion simulations
👉 Inputs:
- (SceneObject) - Object to rotate
Pivot(Vector3) - World-space point to orbit aroundAxis(Vector3) - Rotation axis (default: 0, 1, 0 for Y-axis)Speed(Float) - Degrees per execution (default: 10)
🎬 Streaming Example: “Create a spinning display of subscriber badges orbiting around a central trophy.”
🎯 Tips: Call repeatedly with OnNewFrame for continuous orbiting. Speed is per-call, so multiply by deltaTime for frame-independent rotation. Axis (0,1,0) rotates horizontally, (1,0,0) rotates vertically.
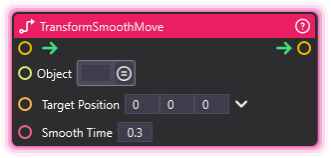
TransformSmoothMove
Section titled “TransformSmoothMove”💡 Simple Explanation: Smoothly moves an object toward a target position with natural acceleration and deceleration.
⚙️ Technical Description: Smoothly interpolates position toward a target with configurable smoothing time, creating natural-feeling motion.
🔍 Full Details & Examples
🔧 How It Works: Moves incrementally toward the target with built-in easing. The object accelerates smoothly and decelerates as it approaches the target.
✨ Perfect For:
- Camera follow systems
- Smooth cursor/pointer movement
- Objects that chase or follow targets
- Gentle position transitions
👉 Inputs:
- (SceneObject) - Object to move
Target(Vector3) - World position to move towardSmooth Time(Float) - Smoothing duration in seconds (default: 0.3)
🎬 Streaming Example: “Make a camera smoothly follow your avatar around the scene with a slight delay for cinematic feel.”
🎯 Tips: Call repeatedly with OnNewFrame for continuous following. Lower smooth time = faster/snappier movement. Higher = smoother/slower. Unlike tweens, this is designed for continuous use, not one-shot animations.
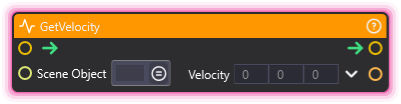
GetVelocity
Section titled “GetVelocity”💡 Simple Explanation: Gets how fast and in what direction an object is moving.
⚙️ Technical Description: Retrieves the linear velocity vector from a Rigidbody component on the specified Scene Object.
🔍 Full Details & Examples
🔧 How It Works: Reads the current velocity from the object’s Rigidbody component and outputs it as a Vector3 (X, Y, Z speeds).
✨ Perfect For:
- Speed-based effects
- Collision predictions
- Motion-reactive behaviors
- Physics debugging
👉 Inputs:
- (SceneObject) - Object with Rigidbody component
👈 Outputs:
Velocity(Vector3) - Current velocity (units per second)
🎬 Streaming Example: “Check if a thrown object is moving fast enough to trigger an explosion effect on impact.”
🎯 Tips: Requires Rigidbody component. Use VectorNormalize to get pure direction. Magnitude of velocity = speed.
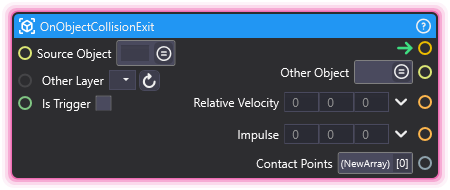
OnObjectCollisionExit
Section titled “OnObjectCollisionExit”💡 Simple Explanation: Triggers when an object stops touching another object.
⚙️ Technical Description: Listener node that fires when a collision with a monitored object ends, providing collision data including the other object, relative velocity, and contact points.
🔍 Full Details & Examples
🔧 How It Works: Monitors an object for collision exits. Fires the output trigger when the monitored object stops colliding with something, providing details about the collision that just ended.
✨ Perfect For:
- Detecting when objects separate
- Cleanup after collisions
- Zone exit detection
- Multi-object interactions
👉 Inputs:
With Object(SceneObject) - Object to monitorIs Trigger(Boolean) - Use trigger colliders instead of physics colliders
👈 Outputs:
Other Object(SceneObject) - Object that was collidingRelative Velocity(Vector3) - Velocity difference at exitImpulse(Vector3) - Force of separationContact Points(Array) - Where collision ended
🎬 Streaming Example: “When a viewer’s avatar leaves a prize zone, trigger a ‘goodbye’ sound effect.”
🎯 Tips: Pair with OnObjectCollision for entry/exit logic. Is Trigger mode works with trigger colliders (non-physical zones).
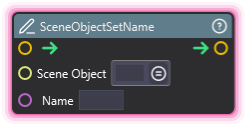
SceneObjectSetName
Section titled “SceneObjectSetName”💡 Simple Explanation: Changes an object’s name in the hierarchy.
⚙️ Technical Description: Sets the name property of a Scene Object, changing how it appears in the hierarchy.
🔍 Full Details & Examples
🔧 How It Works: Changes the object’s display name. This affects how the object appears in the hierarchy panel.
✨ Perfect For:
- Dynamic object labeling
- Debugging spawned objects
- Organizing generated content
- Creating descriptive names for viewer-spawned items
👉 Inputs:
- (SceneObject) - Object to rename
Name(String) - New name
🎬 Streaming Example: “When spawning a badge for a subscriber, name it after their username so it’s easy to find.”
🎯 Tips: Doesn’t affect functionality, only display name. Useful for debugging and organization.
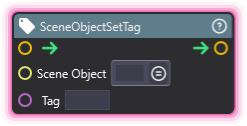
SceneObjectSetTag
Section titled “SceneObjectSetTag”💡 Simple Explanation: Assigns a tag to an object for easy lookup later.
⚙️ Technical Description: Sets the tag property on a Scene Object, enabling lookup via SceneObjectFind or other tag-based operations.
🔍 Full Details & Examples
🔧 How It Works: Assigns a string tag to the object that can be used with SceneObjectFind to locate it later.
✨ Perfect For:
- Marking objects for later reference
- Grouping related objects
- Dynamic object management
- Finding spawned objects
👉 Inputs:
- (SceneObject) - Object to tag
Tag(String) - Tag value
🎬 Streaming Example: “Tag each spawned celebration effect with ‘celebration’ so you can find and destroy them all when the event ends.”
🎯 Tips: Use unique tags for specific objects. Use category tags for groups. Combine with SceneObjectFind for dynamic object management.
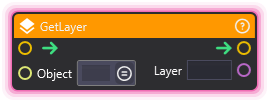
GetLayer
Section titled “GetLayer”💡 Simple Explanation: Reads the layer name of a scene object.
⚙️ Technical Description: Resolves the target scene object and outputs its configured layer name as a string. Empty if the layer slot is unnamed.
🔍 Full Details & Examples
🔧 How It Works: Looks up the scene object by tag, reads its layer index, and returns the matching layer name from the project’s configured layers (falling back to the engine layer table if no project layer matches).
✨ Perfect For:
- Branching on which layer an object belongs to
- Filtering collision events by layer after the fact
- Inspecting object categorization at runtime
- Feeding
ComparisonandLogicGatechains for multi-layer checks
👉 Inputs:
Object(ObjectSelector) - Scene object to query
👈 Outputs:
Layer(String) - Layer name of the scene object
🎬 Streaming Example: “Read each spawned obstacle’s layer with GetLayer, compare it against ‘Targetable’, and route the result through a Conditional so only specific layers receive the powerup buff.”
🎯 Tips: Pair with Comparison (==) to branch on a specific layer, or chain Comparisons through LogicGate (OR) to match any of several layers.
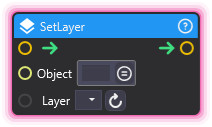
SetLayer
Section titled “SetLayer”💡 Simple Explanation: Changes the layer of a scene object at runtime.
⚙️ Technical Description: Assigns the selected layer to the target scene object. Dropdown options are populated from OverMox’s configured layers. Does not propagate to child objects.
🔍 Full Details & Examples
🔧 How It Works: Resolves the scene object by tag, looks up the chosen layer name in the project’s configured layers, and assigns the matching layer index to that single object. Children stay on their existing layers.
✨ Perfect For:
- Toggling object categorization during execution (e.g. making an object briefly intangible)
- Swapping a scene object between ‘Targetable’ and ‘Untargetable’
- Reassigning pickups after collection
- Dynamic layer-based physics filtering
👉 Inputs:
Object(ObjectSelector) - Scene object to modifyLayer(Dropdown) - Target layer (from OverMox layer settings)
🎬 Streaming Example: “After a viewer collects a powerup pickup, fire SetLayer to move it to ‘Collected’ so future raycasts ignore it without needing to delete the object.”
🎯 Tips: Layer list is synced from OverMox on connection. Only affects the selected object, not its children. Pair with GetLayer for read-modify-write workflows.
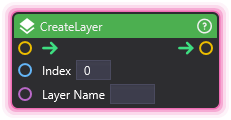
CreateLayer
Section titled “CreateLayer”💡 Simple Explanation: Creates, renames, or clears an OverMox layer by index.
⚙️ Technical Description: Writes a new entry into OverMox’s layer configuration, or renames the entry at the given index. Passing an empty Layer Name clears the entry at that index and removes it from the dropdowns. Valid indexes are 0-5, 9-15 and 25-31; indexes 6-8 and 16-24 are reserved and fail.
🔍 Full Details & Examples
🔧 How It Works: Takes a target index and a layer name, then writes or renames that entry in the project’s layer configuration. An empty Layer Name clears the entry at that index. Indexes 6-8 and 16-24 are reserved, and the node leaves the layers unchanged when one of those is selected.
✨ Perfect For:
- Defining a custom layer (e.g. ‘Alerts’, ‘Overlay’) at graph startup
- Renaming a default layer for a specific scenario
- Automating layer setup without editing layers by hand in the Inspector
👉 Inputs:
Index(Integer) - Target layer index (0-5, 9-15 or 25-31)Layer Name(String) - Layer name to assign. Empty string clears the name at this index.
🎬 Streaming Example: “When your stream starts, create an ‘Alerts’ layer at index 10 so every donation effect you spawn can be put on it.”
🎯 Tips: Indexes 6-8 and 16-24 are reserved; the node logs a warning and leaves the layers unchanged if you pick one of those. An empty Layer Name clears the entry at the given index. Changes persist in the project’s layer configuration and become visible to GetLayer, SetLayer, and Other Layer dropdowns on next refresh.