Layers
Layers let you control which scene objects are visible to which cameras and affected by which lights. Use layers to create selective visibility, organize rendering, and build complex multi-camera setups.
What Are Layers?
Section titled “What Are Layers?”Every scene object exists on one or more layers. Cameras and lights can be configured to only see or affect objects on specific layers. This creates powerful control over what renders where.
Common uses:
- Hide UI elements from certain cameras
- Create picture-in-picture setups
- Make objects visible only to specific cameras
- Separate lighting for different scene elements
- Isolate effects to specific areas
How Layers Work
Section titled “How Layers Work”Object Layers
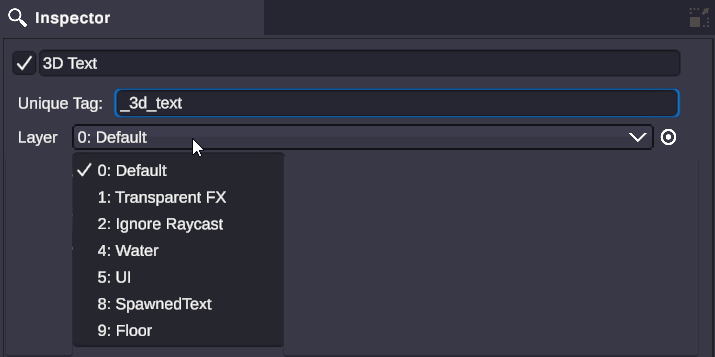
Section titled “Object Layers”Each scene object is assigned to a layer. By default, objects are on the “Default” layer. You can change an object’s layer in the Inspector.
Camera Culling Mask
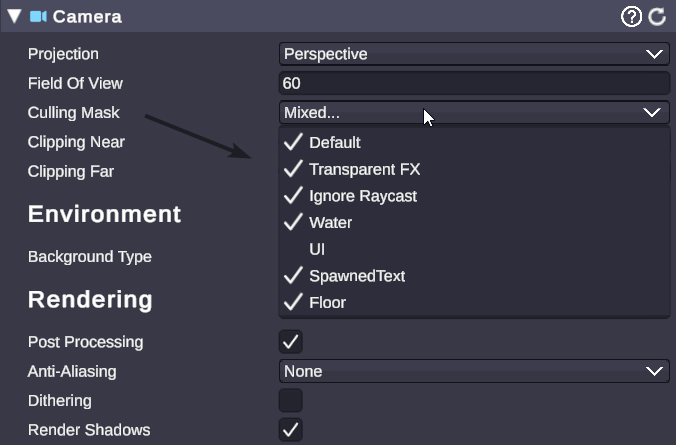
Section titled “Camera Culling Mask”Cameras have a Culling Mask that determines which layers they render:
- Layers in the mask = visible to that camera
- Layers not in the mask = invisible to that camera
A camera with only “UI” in its culling mask will only render objects on the UI layer.
Light Culling Mask
Section titled “Light Culling Mask”Lights also have culling masks that determine which layers they illuminate:
- Layers in the mask = lit by that light
- Layers not in the mask = not affected by that light
This lets you create lighting that only affects specific objects.
Available Layers
Section titled “Available Layers”| Layer | Typical Use |
|---|---|
| Default | General scene objects |
| UI | User interface elements |
| Background | Environment and backdrop |
| Effects | Particles and visual effects |
| Custom layers | Your own organization |
The exact available layers depend on your project configuration.
Setting Object Layers
Section titled “Setting Object Layers”- Select a scene object in the Hierarchy
- Open the Inspector
- Find the Layer dropdown at the top
- Select the desired layer
All child objects can optionally inherit the parent’s layer.
Configuring Camera Culling
Section titled “Configuring Camera Culling”- Select a Camera in your scene
- In the Inspector, find Culling Mask
- Check the layers this camera should render
- Uncheck layers to hide from this camera
Example: Picture-in-Picture
Section titled “Example: Picture-in-Picture”Create a two-camera setup where a small camera shows only your avatar:
- Put your avatar on a “Streamer” layer
- Main camera: Render all layers
- PiP camera: Render only “Streamer” layer
- The PiP shows just your avatar with no background
Configuring Light Culling
Section titled “Configuring Light Culling”- Select a Light in your scene
- In the Inspector, find Culling Mask
- Check the layers this light should affect
- Uncheck layers to exclude from this light
Example: Separate Character Lighting
Section titled “Example: Separate Character Lighting”Light your avatar differently from your environment:
- Put avatar on “Character” layer
- Put environment on “Background” layer
- Key light: Only affects “Character” layer
- Ambient light: Only affects “Background” layer
- Adjust each light independently
Common Layer Setups
Section titled “Common Layer Setups”Basic Streaming Setup
Section titled “Basic Streaming Setup”| Layer | Contents | Main Camera | Overlay Camera |
|---|---|---|---|
| Default | Scene objects | ✓ | ✓ |
| UI | Alerts, overlays | ✗ | ✓ |
| Background | Skybox, environment | ✓ | ✗ |
Multi-Camera Production
Section titled “Multi-Camera Production”| Layer | Contents | Camera A | Camera B | Camera C |
|---|---|---|---|---|
| Default | Shared objects | ✓ | ✓ | ✓ |
| SetA | Set A decoration | ✓ | ✗ | ✗ |
| SetB | Set B decoration | ✗ | ✓ | ✗ |
| Streamer | Avatar/webcam | ✓ | ✓ | ✓ |
🎯 Plan Your Layers: Before building complex scenes, sketch out which objects need to be on which layers.
🎯 Use Descriptive Names: Name custom layers clearly (e.g., “AlertEffects” not “Layer7”).
🎯 Default is Default: Keep most objects on Default unless they need special treatment.
🎯 Test Each Camera: After setting up layers, switch between cameras to verify each sees what it should.
🎯 Lighting Consistency: Remember that objects on excluded layers won’t receive that light - they may appear dark.
🎯 Performance: Layers themselves don’t cost performance. Use them freely for organization.
Troubleshooting
Section titled “Troubleshooting”Object Not Visible
Section titled “Object Not Visible”- Check the object’s layer assignment
- Check the camera’s culling mask includes that layer
- Verify the object is enabled
- Check the object isn’t behind the camera
Object Not Lit
Section titled “Object Not Lit”- Check the light’s culling mask includes the object’s layer
- Verify the light is in range
- Check light intensity isn’t zero
- Ensure the object’s material receives lighting
Wrong Camera Showing Object
Section titled “Wrong Camera Showing Object”- Review culling masks on all cameras
- Make sure the object is on the correct layer
- Check camera render order and priorities
Related
Section titled “Related”- Scene Objects - Objects that exist on layers
- Inspector - Where you set layer assignments
- Components - Rendering - Camera and light components